DIY Artificial Grass Installation Guide

DIY Artificial Lawn Installation Guide from Perth’s Specialists
DIY Artificial Lawn Installation Guide from Perth’s Specialists
Install artificial grass like a pro with this DIY guide tailored for Perth conditions. It covers base preparation, laying and seaming, pinning, and infill so synthetic grass looks natural and drains properly. Whether laying a small verge or a full backyard, the steps below show how to avoid common mistakes – like visible joins or uneven bases – that make fake grass look artificial. Pick up supplies including pins, joining tape, silica sand, and PetFill®, and ask our team for product‑specific advice. For larger or complex areas, consider professional help for excavation, drainage, and laser‑accurate levels.
Note: Power brooms and compactors can be hired from providers such as Kennards Hire. Check availability at your nearest branch.
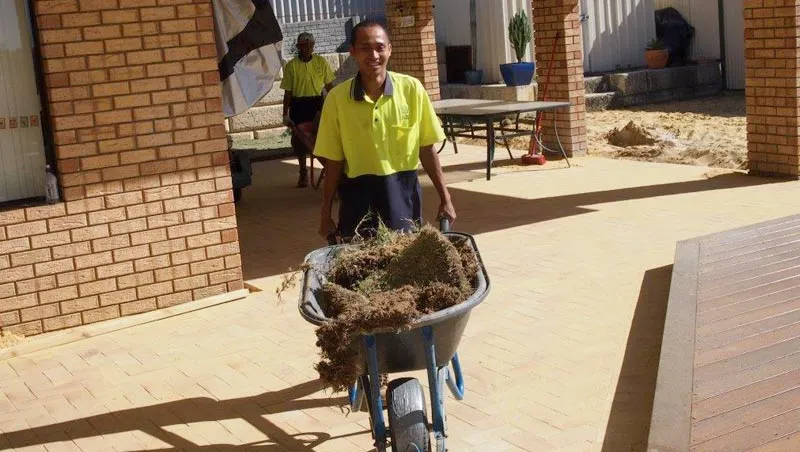
Site ExcavationRemove all old lawn, sand, or rubble. Be sure to eliminate any roots or stumps that could decompose over time and cause uneven areas under your new lawn. Cap sprinklers or remove reticulation systems as needed. Excavate to accommodate 60mm of compacted cracker dust/crushed blue metal, plus the height of the grass. Consider the desired elevation of the lawn above surrounding paving or driveways. After excavation, level the area with a rake and sand spreader. If borders are needed to prevent base crumbling, install them at this stage. Skip Bins: For 100mm excavation, allocate 1m3 of skip bin for every 10m2 of area. |
 |
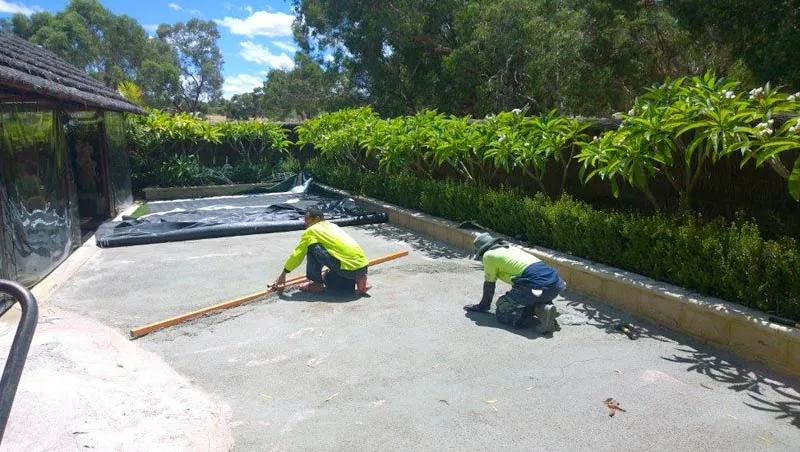
Base PreparationPrepare the base using 60mm of compacted cracker dust / crushed blue metal. For verge installations where vehicles may park, use an 80mm road base layer topped with 20mm of compacted cracker dust. Spread and level the base before screeding it flat. Hose down the base, compact it thoroughly, and screed again to ensure a smooth surface. The area is now ready for grass installation. Why Cracker Dust / Crushed Blue Metal? This material compacts well, ensures a smooth finish, and allows efficient water drainage. It is more stable than yellow sand and is available from landscaping suppliers like Soils Aint Soils. |
 |
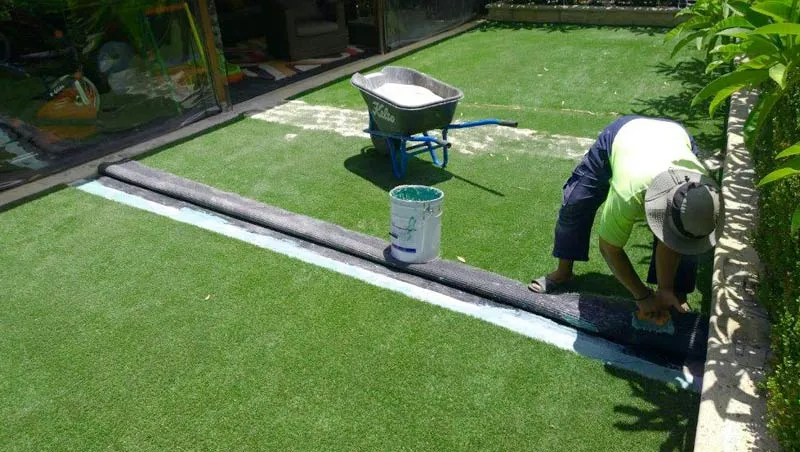
Laying the GrassEnsure all pieces of grass run in the same direction. Cut the grass to the required lengths using a sharp blade (e.g., a Stanley knife). Position the grass carefully. For joins, align pieces side by side without glue initially to achieve a seamless connection. To ensure an invisible join, remove the selvedge and two stitch lines from the edges of the lawn. Once satisfied, fold back the edges, place joining tape on the base, and fold the grass back into position. |
 |
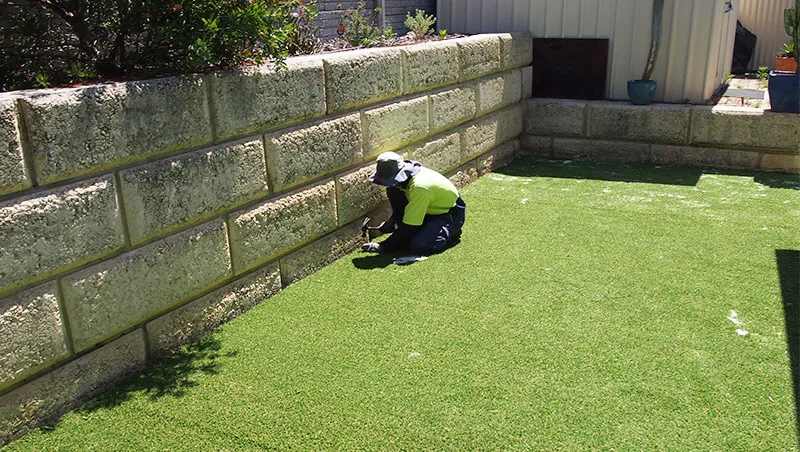
Securing with PinsSecure the grass by placing pins every 200mm. This ensures a neat, firm finish and adds stability. |
 |
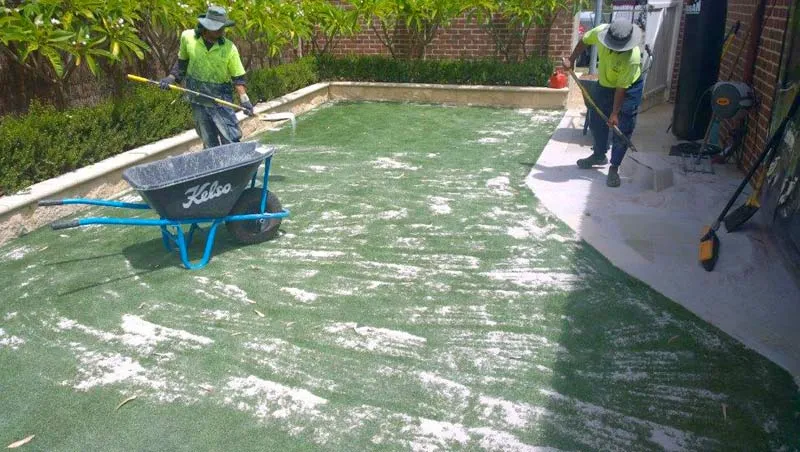
Infill ApplicationSpread silica sand at a rate of 10-14kg per square meter (depending on the grass type). For PetFill®, apply approximately 7-10kg per square meter. Confirm the required quantity of infill when purchasing your grass. Use a stiff broom or power broom to brush the sand evenly into the grass. |
 |
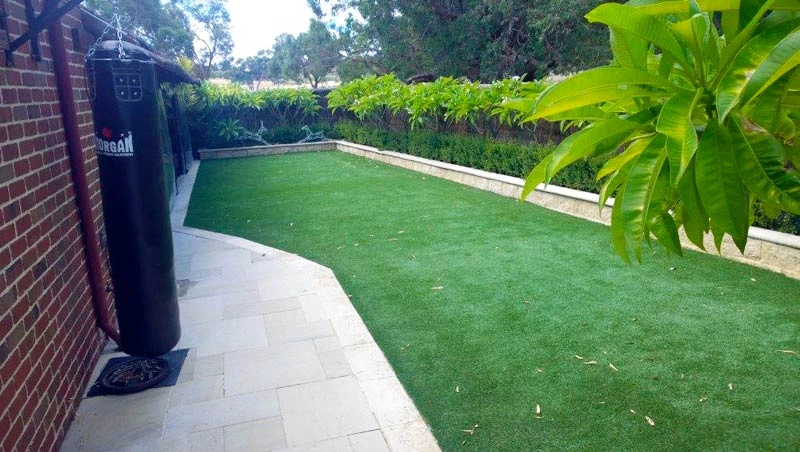
Admire Your WorkRelax and enjoy your new lawn! It’s water-free, maintenance-free, and stays lush year-round. |
 |
 |
Site ExcavationRemove all old lawn, sand, or rubble. Be sure to eliminate any roots or stumps that could decompose over time and cause uneven areas under your new lawn. Cap sprinklers or remove reticulation systems as needed. Excavate to accommodate 60mm of compacted cracker dust/crushed blue metal, plus the height of the grass. Consider the desired elevation of the lawn above surrounding paving or driveways. After excavation, level the area with a rake and sand spreader. If borders are needed to prevent base crumbling, install them at this stage. SKIP BINS: For 100mm excavation, allocate 1m3 of skip bin for every 10m2 of area. |
|
Base PreparationPrepare the base using 60mm of compacted cracker dust / crushed blue metal. For verge installations where vehicles may park, use an 80mm road base layer topped with 20mm of compacted cracker dust. Spread and level the base before screeding it flat. Hose down the base, compact it thoroughly, and screed again to ensure a smooth surface. The area is now ready for grass installation. Why Cracker Dust / Crushed Blue Metal? This material compacts well, ensures a smooth finish, and allows efficient water drainage. It is more stable than yellow sand and is available from landscaping suppliers like Soils Aint Soils. |
|
Laying The GrassEnsure all pieces of grass run in the same direction. Cut the grass to the required lengths using a sharp blade (e.g., a Stanley knife). Position the grass carefully. For joins, align pieces side by side without glue initially to achieve a seamless connection. To ensure an invisible join, remove the selvedge and two stitch lines from the edges of the lawn. Once satisfied, fold back the edges, place joining tape on the base, and fold the grass back into position. |
|
Securing with PinsSecure the grass by placing pins every 200mm. This ensures a neat, firm finish and adds stability. |
|
Infill ApplicationSpread silica sand at a rate of 10-14kg per square meter (depending on the grass type). For PetFill®, apply approximately 7-10kg per square meter. Confirm the required quantity of infill when purchasing your grass. Use a stiff broom or power broom to brush the sand evenly into the grass. |
|
Admire Your WorkRelax and enjoy your new lawn! It’s water-free, maintenance-free, and stays lush year-round. |
Site Excavation
Remove all old lawn, sand, or rubble. Be sure to eliminate any roots or stumps that could decompose over time and cause uneven areas under your new lawn. Cap sprinklers or remove reticulation systems as needed.
Excavate to accommodate 60mm of compacted cracker dust/crushed blue metal, plus the height of the grass. Consider the desired elevation of the lawn above surrounding paving or driveways.
After excavation, level the area with a rake and sand spreader. If borders are needed to prevent base crumbling, install them at this stage.
SKIP BINS: For 100mm excavation, allocate 1m3 of skip bin for every 10m2 of area.
Base Preparation
Prepare the base using 60mm of compacted cracker dust / crushed blue metal. For verge installations where vehicles may park, use an 80mm road base layer topped with 20mm of compacted cracker dust.
Spread and level the base before screeding it flat. Hose down the base, compact it thoroughly, and screed again to ensure a smooth surface. The area is now ready for grass installation.
Why Cracker Dust / Crushed Blue Metal?
This material compacts well, ensures a smooth finish, and allows efficient water drainage. It is more stable than yellow sand and is available from landscaping suppliers like Soils Aint Soils.
Laying The Grass
Ensure all pieces of grass run in the same direction.
Cut the grass to the required lengths using a sharp blade (e.g., a Stanley knife). Position the grass carefully. For joins, align pieces side by side without glue initially to achieve a seamless connection. To ensure an invisible join, remove the selvedge and two stitch lines from the edges of the lawn. Once satisfied, fold back the edges, place joining tape on the base, and fold the grass back into position.
Securing with Pins
Secure the grass by placing pins every 200mm. This ensures a neat, firm finish and adds stability.
Infill Application
Spread silica sand at a rate of 10-14kg per square meter (depending on the grass type). For PetFill®, apply approximately 7-10kg per square meter. Confirm the required quantity of infill when purchasing your grass. Use a stiff broom or power broom to brush the sand evenly into the grass.
Admire Your Work
Relax and enjoy your new lawn! It’s water-free, maintenance-free, and stays lush year-round.

Frequently Asked Questions
Yes – small to medium areas are manageable if base compaction, seaming, and pinning are done correctly. Complex sites (levels/drainage) may benefit from professional installation.
Use 60mm compacted cracker dust/crushed blue metal; for vehicle‑load verges, add road base beneath. A stable, screeded base improves drainage and finish.
Remove the selvedge and two stitch lines from both edges, align fibres in the same direction, and use joining tape and adhesive as specified.
Infill supports fibres, adds weight, improves stability/cooling, and can help with odour control (PetFill). Quantity depends on grass type and usage.
Compactor, screed, rake, hose, utility knife, pins, joining tape/adhesive, and a stiff/power broom; plus PPE for safety.